
 5. Download and installing 2018.1
Once you've gone through all prior steps of the upgrade guide and taken the required actions, you are ready for the actual installation of version 2018.1. Here's a step-by-step guide.
Installation Guide
This guide is assuming that you have an already existing LEAPWORK installation up and running and the required environments to support it. If your LEAPWORK Platform components (Studio, Controller, Agent) are installed on separate environments, the order of upgrade should be:
- Controller
- Studio(s)
- Agents
The 2018.1 release contains new versions of all the LEAPWORK components (Controller, Studio, and Agent) but there are no changes to the system requirements attached to this upgrade.
PLEASE NOTE! When upgrading to 2018.1 from version 2.5, you are required to have gone through all steps in the upgrade guide. If you're unsure whether you've have taken the required actions, please go through the guide from the beginning.
To start the installation, do the following:
- Download the new version from the download page.
- Doublhttps://account.leapwork.com/downloadse-click the .msi-file to start the installation.
- The first screen will display the version number and ensure that the downloaded version fits your computer. Click 'Next' to begin the installation.

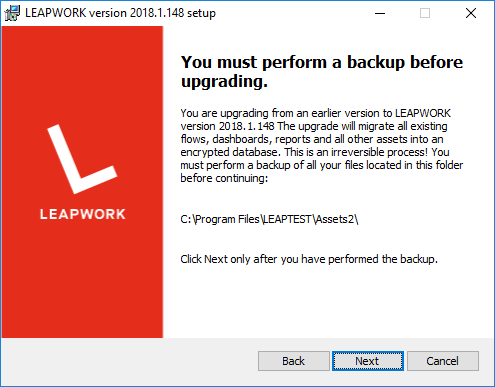
- Make sure you have a backup of existing assets and resources.
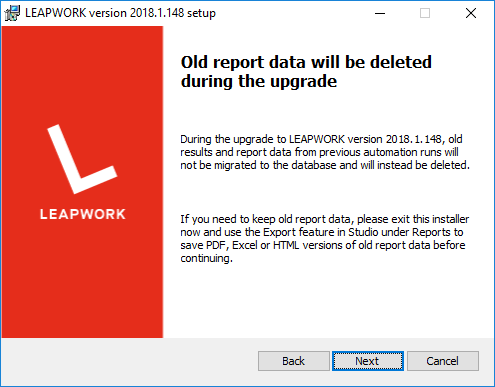
- Make sure you have an export of the reporting data you need before proceeding with the upgrade.
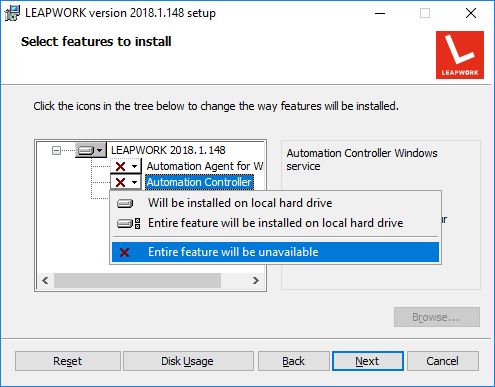
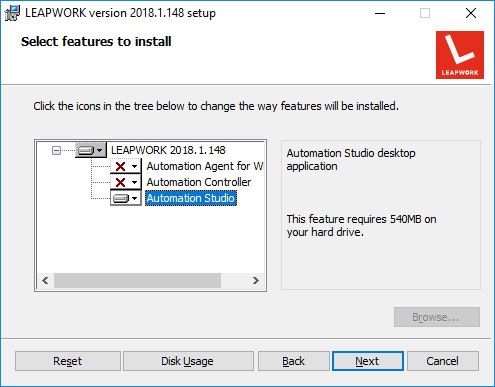
- Choose which of the three components to install on the computer. Do this by clicking the drop arrows and choosing the appropriate option for each component. In the example below, only Studio will be installed on the local computer.
- The Configuration screen will show different messages depending on which LEAPWORK component you are installing. All the settings can be changed afterwards in the config files for the Controller, Studio, and Agent.
Controller:
If the existing Assets folder is located at the default location: c:\program files\LEAPTEST\Assets, the installer will move the assets folder to c:\program files\LEAPWORK\Assets as part of the upgrade. Remark: the original files will not be deleted but will also be moved to the new asset folder to ensure a backup in case of problems.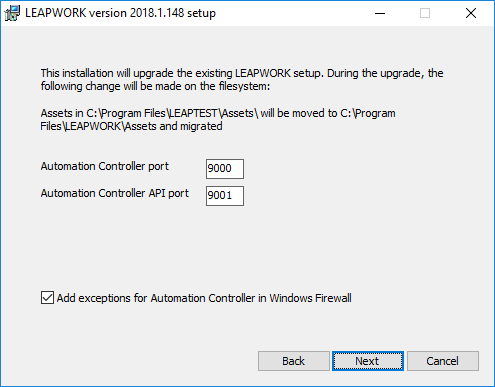 If the existing Assets folder has been changed to a location different from the default location (c:\program files\LEAPTEST\assets) then the installer will NOT move the files but perform the upgrade at the same location.
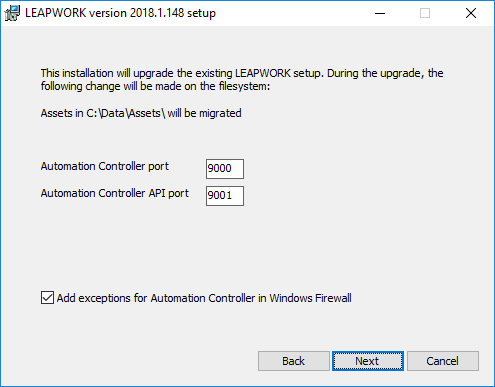 The following settings can be configured for the Controller:
Controller port. Studio and the Controller always communicate using internal API calls, and this requires the use of a TCP port. The default is port 9000, which you can change to any other port number that is not in use by other software on your computer. NOTE: Unless it is necessary for any particular reason, we do not recommend changing either the Controller, Controller API or Agent port numbers.
Controller API port. For any integration effort, access LEAPWORK’s open REST API using the port number set here. The default is port 9001, which you can change to any other port number that is not in use by other software on your computer. NOTE: Unless it is necessary for any particular reason, we do not recommend changing either the Controller, Controller API, or Agent port numbers.
Add exceptions for the Controller in Windows Firewall. A check in this box will direct the installation process to add a rule to the Windows Firewall to permit all incoming connections to the Automation Controller. NOTE: Because the LEAPWORK Automation Platform is also often used in corporate and already secure test networks, the password is optional.
Studio:
The following settings can be configured for Studio: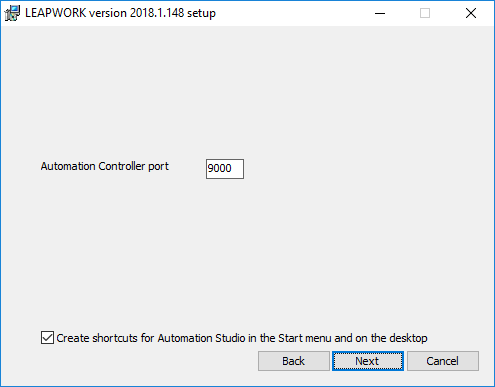 Controller port. Studio and the Controller always communicate using internal API calls, and this requires the use of a TCP port. The default is port 9000, which you can change to any other port number that is not in use by other software on your computer. NOTE: Unless it is necessary for any particular reason, we do not recommend changing either the Controller, Controller API or Agent port numbers.
If both Controller and Studio is selected for the installation, this setting covers both.
Create Studio shortcut in Start Menu. A check in this box will direct the installation process to add a LEAPWORK Studio shortcut to the Windows Start Menu. This shortcut makes it easy to find and start the application at any time.
Agent:
The following settings can be configured for Agent: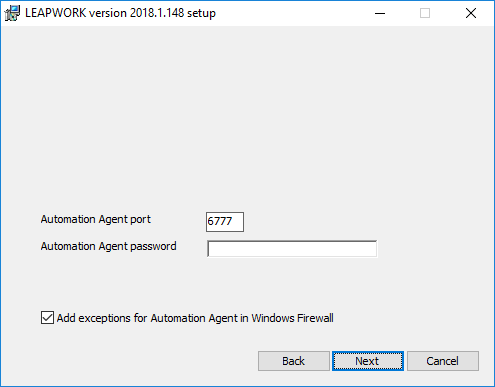 Agent port. Automation flows run in the Agent, which communicates with Studio and the Controller through a closed remote-control protocol on a specific TCP port. The default port is 6777, which you can change to any other port number not in use by other software on the computer. NOTE: Unless it is necessary for any particular reason, we do not recommend changing either the Controller, Controller API, or Agent port numbers.
Agent password. Because the Agent uses a remote-control protocol, we advise you to set a password to prevent unauthorized parties from connecting to it.
Add exceptions for the Agent in Windows Firewall. A check in this box will direct the installation process to add a rule to the Windows Firewall to permit all incoming connections to the Agent. - Click “Next” on the configuration screen.
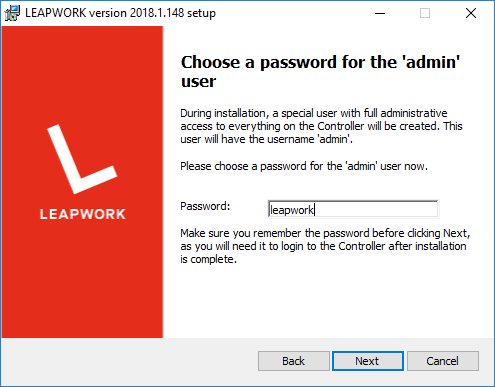
- Specify a password for the default user (“Admin”). The “admin” user is used for the first login in Studio after the installation. Note, that the password you enter for the admin user is securely located in your local installation only. LEAPWORK cannot assist in retrieving this password should you forget it.
- Save the database encryption key, which is used to protect the database files created during the upgrade. This key is used to allow the Controller to gain access to the database files, so in case the Controller needs to be moved to a new machine or in case of a restore of the LEAPWORK system, this key is needed.
Save the key in a protected and safe place.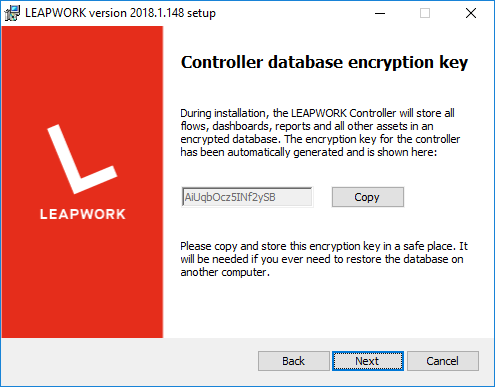
- Click 'Install'
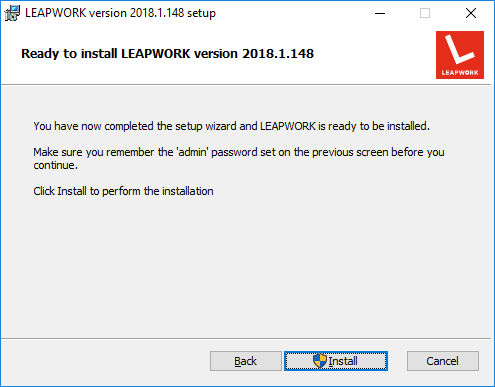
- After the installation is complete, click 'Finish' to exit the installer.
 Be aware that when you have installed the Controller, it will immediately start the migration of the existing assets and resources to the new version.
 - Repeat this installation guide for each LEAPWORK component and machine in your environment.
Activation guide
Among many other things, release 2018.1 introduces a new license engine as well as user management on the Controller.
As outlined in step 3 of the upgrade guide, an admin user is per default added to your LEAPWORK system, and you provide a password for the admin user as part of the installation. Don’t lose this password! Without it, you cannot login as the admin user. LEAPWORK Support will not be able to reset this password, as it is kept on your local Controller instance.
After installing all LEAPWORK components, start LEAPWORK Studio. The Controller will broadcast its location (IP address), so in most cases, Studio already knows the location of the Controller at the first start. Login using admin as user and the password specified during the installation.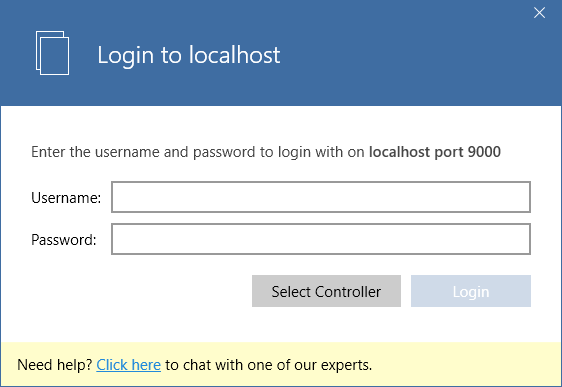
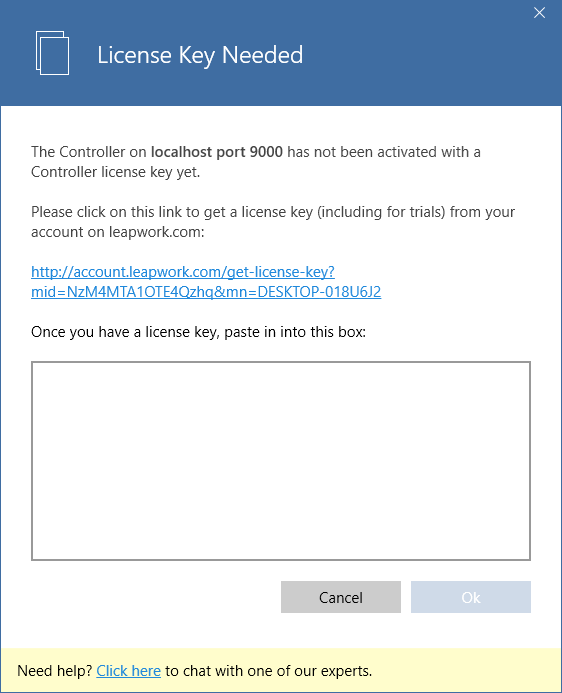
Once logged in as admin, Studio will prompt you to enter the license key.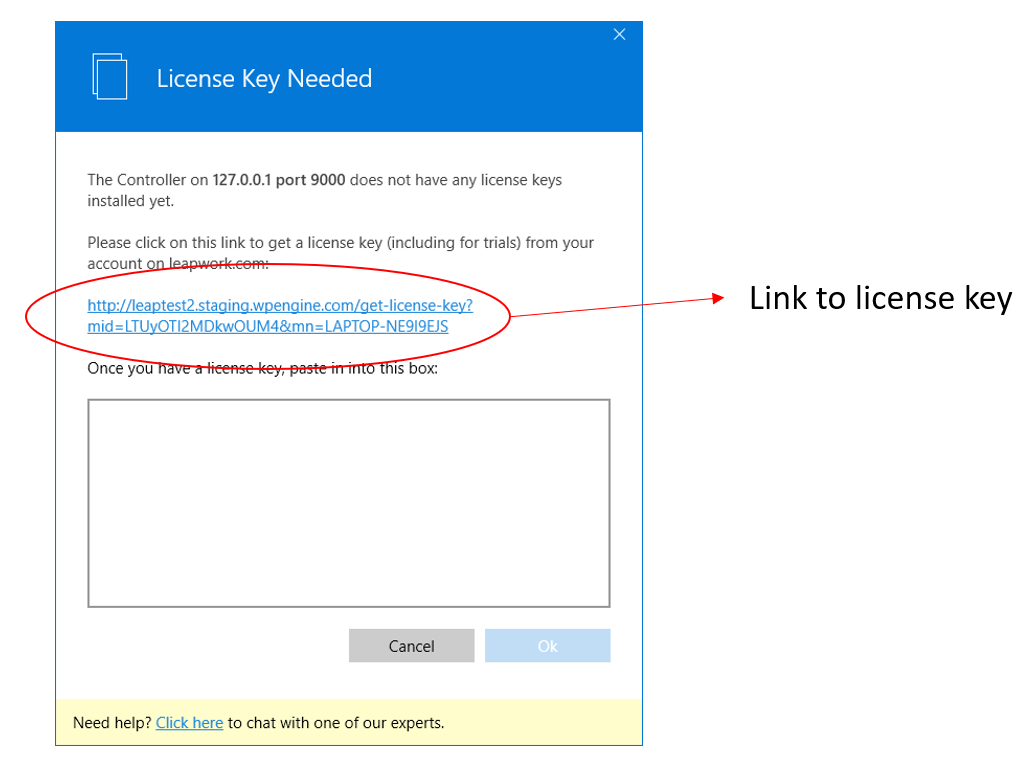
The license key is stored on the Controller, and only need to be added once.
To obtain the license key, click the link in the dialogue, which will open a browser and take you to account.leapwork.com. On account.leapwork.com you will have to log in using one of the accounts (e-mail/password) that you have used previously to login to LEAPWORK.
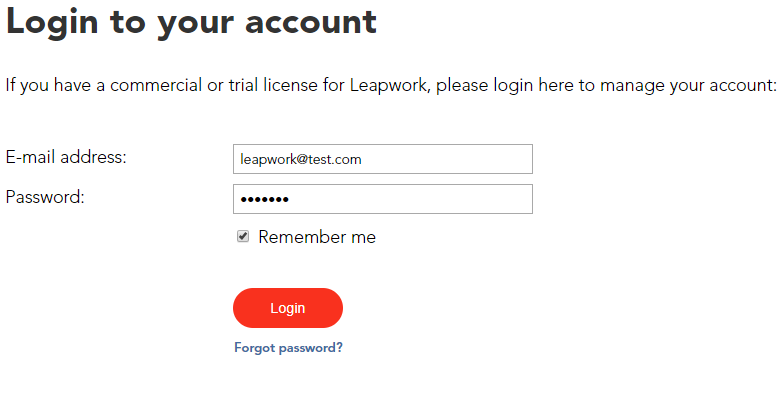
These accounts are now used for account management on leapwork.com only and will not serve as a login to LEAPWORK. In case of problems with the login, please contact LEAPWORK Customer Success.
After a successful login on leapwork.com, the license management page opens. This page contains a few different sections:
Get license key:
Use the form to generate a new license key.
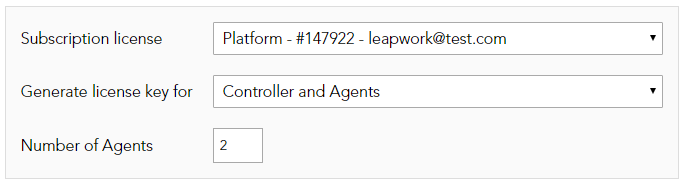
To generate a new license, do the following:
- Select an active subscription
- Select which kind of license to generate as it is possible to add multiple licenses to the same Controller
- Specify the number of Agents to add to the license, unless the license type is 'Controller only'.
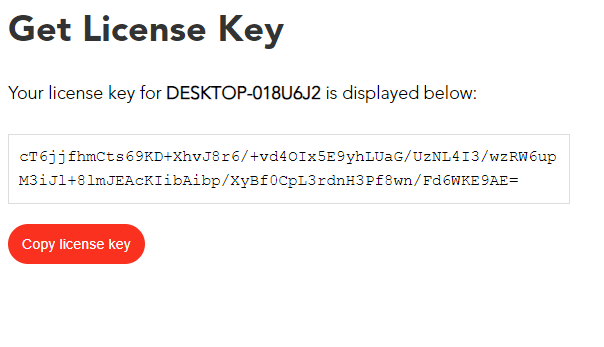
- Click 'Get license key'
- Copy the license key by clicking 'Copy license key'
Subscriptions:
This is a list of the purchased subscriptions, both active and expired.
Each subscription shows how many unused Controllers and Agents is available for the subscription, and the expiration date for the subscription.
License keys:
Whenever you generate a license key, it is added to this list, so its possible to download the license key and gain an overview of the active licenses.
It is fully acceptable to deactivate a license and generate a new license with another number of Agents. Read more about License Management.
In Studio, paste the copied license key into the field and click OK.
LEAPWORK is now ready for use.
Any subsequent additions to your LEAPWORK setup (additional Controllers, Agents) are enabled in separate license keys. In an already active LEAPWORK setup, new licenses are added in Studio’s Settings > License Management section, which is also where you can deactivate existing licenses. Read more about License Management.
Setting up users
Setting up users depends on your license type. A Single-User License requires all LEAPWORK components to be installed on the same machine. The Platform License type is multi-tiered and it requires a bit more work to get started.
Single User Licenses
With a Single-User License you can immediately start using LEAPWORK upon the completed installation. You can log in to Studio using the predefined admin user and the password specified during the installation.
Platform Licenses
With a Platform license, you need to ensure that members of your team can now start using LEAPWORK. From a user perspective it’s not a big change. You need to create all users you want to be able to log in on the Controller. Don’t worry, this is a one-off activity, future releases of LEAPWORK will of course migrate existing users to the new version.
User management is done in Studio, click Settings > User management.
The list of users on the Controller is the first thing you’ll see – it should look a little like this, with only the pre-configured admin user on-board:
 Using your list prepared in step 3 of this upgrade guide, create the users you need. Click Add User, which presents the Add user dialogue:
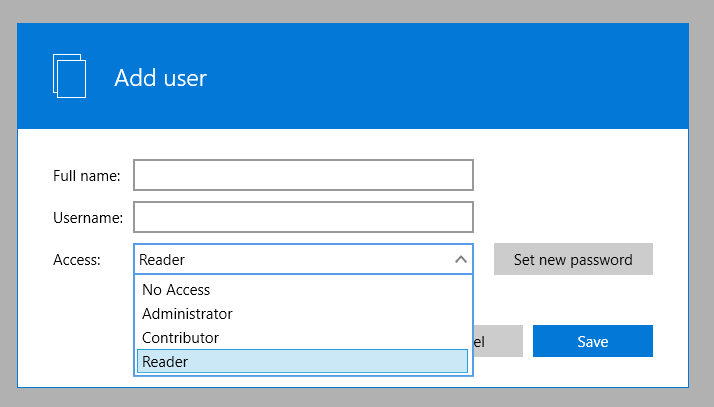
There are no specific requirements for the username in terms of format or length. Note the access definition, this corresponds to the role of the user. The four roles are briefly described below:
- Administrator: Has full access to everything, including creating and maintaining users, assets, settings and view the audit log. Administrators can also access the encryption key for the database.
- Contributor: Can create and edit all assets and execute flows but can’t edit some settings and can’t view the audit log.
- Reader: Can open all assets in read-only mode but can’t edit anything nor run flows. It’s basically look-but-don’t-touch access.
- No access: Can’t view or edit anything. This access level is used to quickly remove access for users without deleting them.
For the user’s password, you can either specify one yourself or have LEAPWORK generate one for you.
Once you have added these parameters, you can click Save, and the user is created. Share the credentials with the relevant user to enable them to log in and use LEAPWORK. When each user starts their upgraded instance of Studio, they must choose which Controller to log on to. They will then be prompted for the credentials you have defined using this guide.