.svg "Leapwork")


Bamboo from Atlassian is a platform for managing a release pipeline. This includes building, deploying, testing and distributing software, which obviously makes it an interesting integration point for Leapwork. To make it easy to use Leapwork as part of a release pipeline, “friends of Leapwork” has developed an opensource native plugin to Bamboo.
You can find information about the plugin here: https://github.com/leapwork/Bamboo-plugin
In the following we will walk through the installation of the plugin and how to add a Leapwork task to a build plan in Bamboo. The guide below assumes that you have a running version of Bamboo and that you have a basic understanding of both Bamboo and Leapwork.
Installation:
- Download plugin from here: https://github.com/leapwork/Bamboo-plugin/releases/tag/V4.0.1

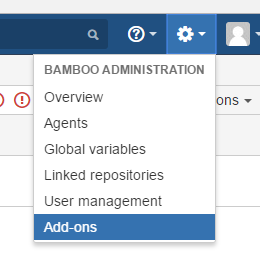
- Start up your Bamboo in a browser and navigate to the “Manage apps” in the settings menu.
- Select “Upload apps”, and choose the file downloaded from the GitHub repository (1).
- Once you see the “Installed and ready to go!” – well then, the plugin is correctly installed. Be aware that 2 errors can occur at this stage – please ignore these errors, it’s because of a server setting for the ‘home address’ (‘localhost’ versus the IP address of the machine Bamboo is running on).

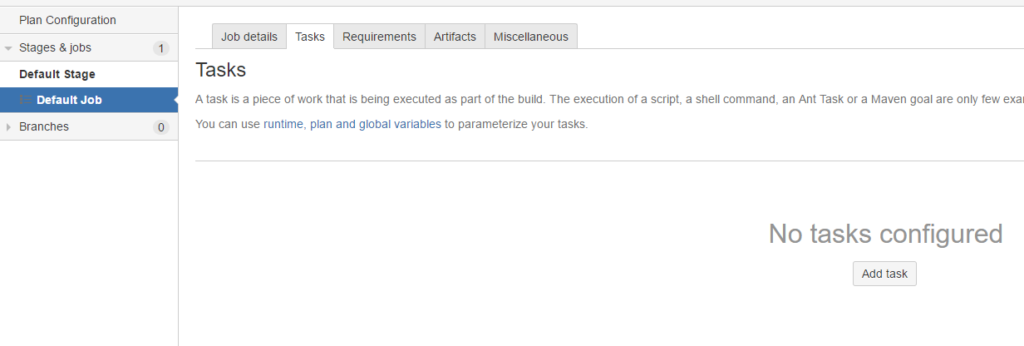
- Create or open the build plan where you want to trigger Leapwork from.
- Select “Configure plan” from the “Actions” menu.
- Open the Stage and Job where you want to trigger Leapwork from (i.e., “Default Stage” -> “Default Job”) and click “Add task”.
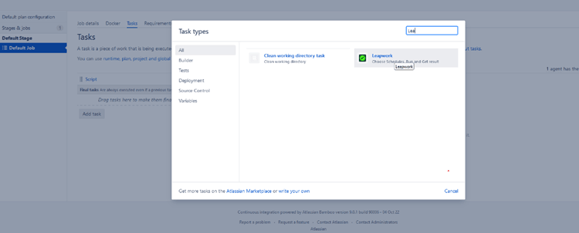
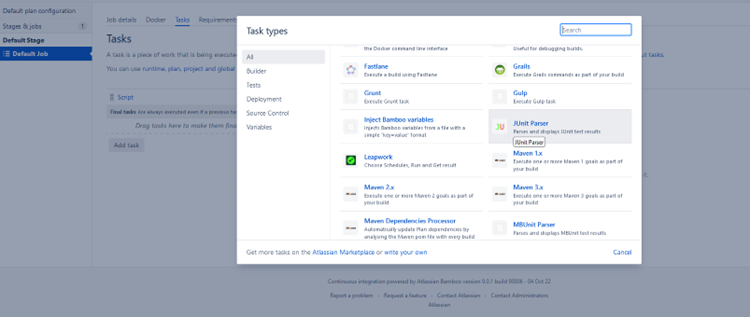
- In the “Task types” dialog select “Tests” in the left menu and click on “Leapwork Integration”. This will add a Leapwork integration job to the Job.
- In the form, fill in the following fields:
- Task description (optional but could be the name of the schedule triggered in Leapwork).
- Plugin version – should match the one downloaded and installed from the GitHub repository. It’s possible to have multiple versions installed.
- Server URL: the location of the Leapwork Controller which has a public REST API. (i.e., ‘http://localhost:9000’, ‘http://myserver.internal-domain.dom:9123’).
- Time delay (use default).
- Case Done status as (use default).
- JUnit report file path: This file will contain the test results returned from Leapwork. Unless ‘report.xml’ conflicts with other tasks added in the build plan, just leave it to the default. If the value is changed then the value for the JUnit task should be updated as well.
- Schedules names: A Schedule is a selection of one or more Leapwork test cases and is created and maintained in Leapwork. By selecting one or more Schedules the test cases in the Schedule(s) will be executed when the Bamboo task is executed.
- Pressing ‘Select Schedules’ opens a list of the Projects in Leapwork and by expanding the individual projects one or more Schedules can be selected.
- Press ‘Save’
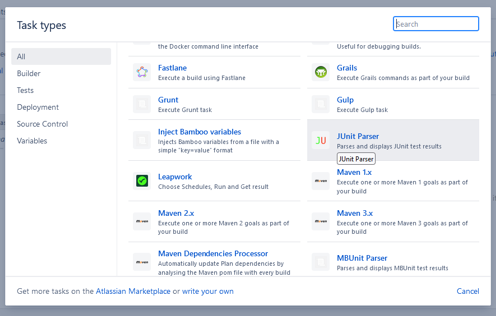
- To read the test results correctly back into Bamboo, add a ‘JUnit Parser’ task after the ‘Leapwork Integration’ task added above. Click ‘Add task’, select ‘Tests’ and select the ‘JUnit Parser’ plugin.
- In the ‘JUnit Parser’ configuration add a ‘Description’ and change the ‘Specify custom results directories’ to the value ‘report.xml’ (if it’s changed in 9.6 this should have the same value).
- Click ‘Save’
- You now have a base setup and are ready to run the build plan.