Azure Active Directory Server Connection
Azure Active Directory is a cloud-based identity and access management service provided by Microsoft Azure. It serves as a comprehensive solution for managing user identities, securing access to resources, and enabling single sign-on across various cloud applications and services.
Note: This feature can be accessed by Leapwork Admin only.
Add Connection
To add a connection, click the Add button and the following pop-up appears:
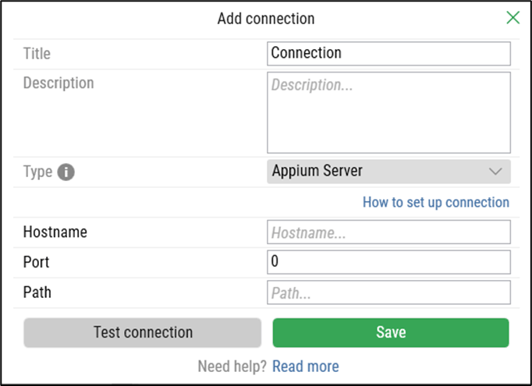
On the Add Connection pop-up window:
- Enter the title in the Title field. It should be unique.
- Enter the description in the Description field.
- From the Type drop-down, select the Azure Active Directory server option:

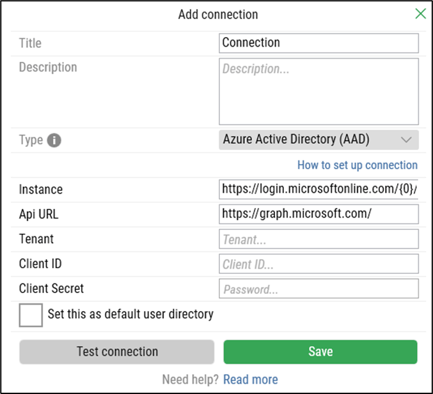
- Select Azure Active Directory Server and the following new fields appear:
 Note: To complete the Add Connection process, follow the next steps in the Azure portal (https://portal.azure.com/).
 -
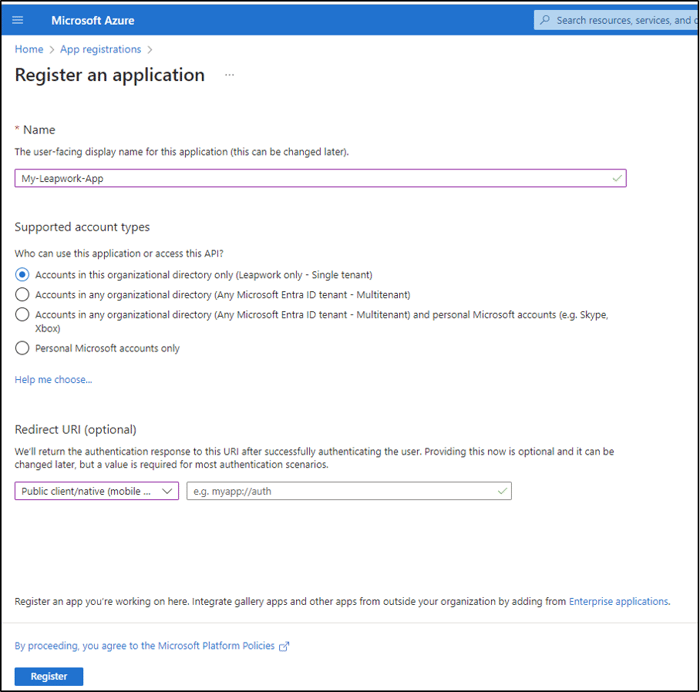
Click the App Registration to create a new app registration.
-
Enter the name in the Name field.
-
Select the users from the Supported Account Types options.
-
Click Register button.
-
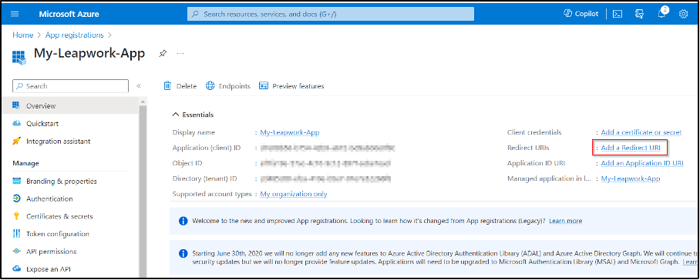
Click the Add a Redirect URI hyperlink on the Overview Section window of the new application:
-
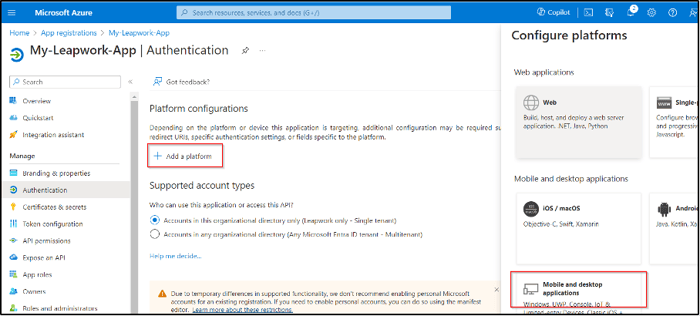
Click the Add a Platform option.
-
Click Mobile and Desktop Applications button in Configure platforms field.
-
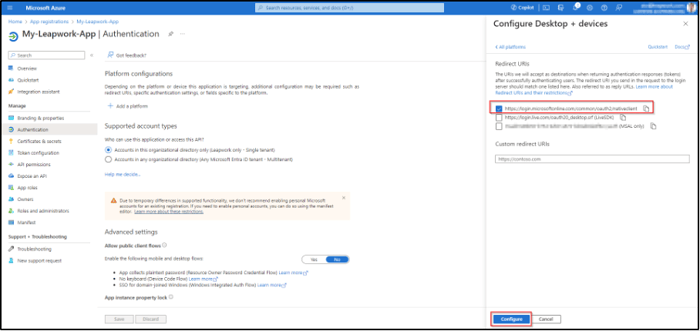
Select the https://login.microsoftonline.com/common/oauth2/nativeclient checkbox.
-
Click Configure button.
-
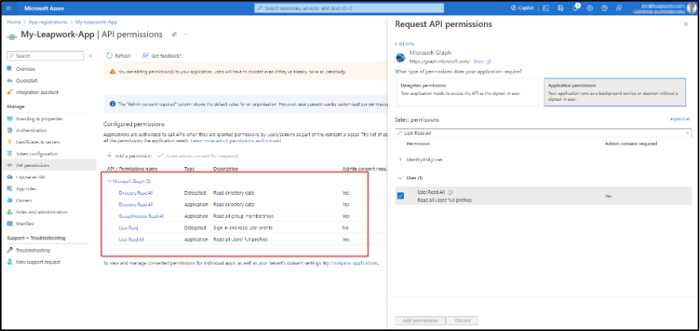
On the API Permissions section:
-
Click Add a Permission button.
-
Select Microsoft Graph option.
-
Select Application Permissions button.
-
Select “User.Read.All”, “Directory.Read.All”, and “GroupMember.Read.All” in the Users checkbox.
-
Select Delegate Permissions button.
-
Add “Directory.Read.All”, and “User.Read” in the Users checkbox.
-
Click the Add Permissions button.
-
-
On the Certificates & Secrets section:
-
Click Next Client Server button.
-
Write a description in the Description field.
-
Select an expiration date from the Expiration dropdown.
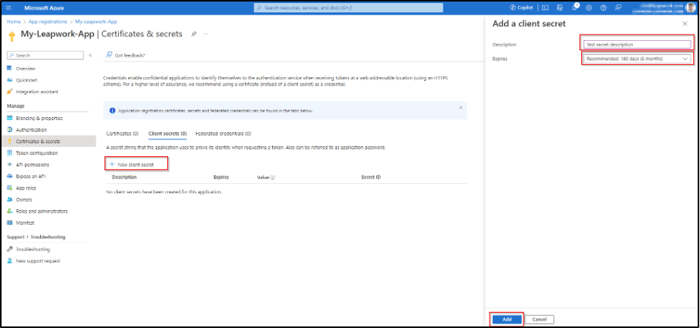
-
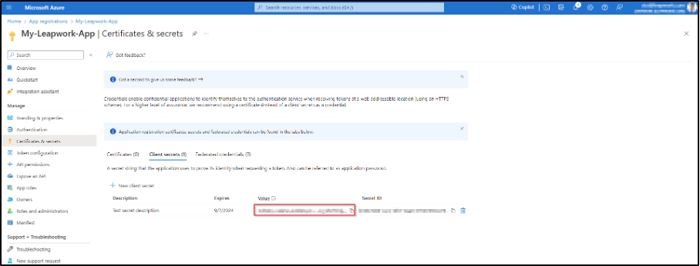
- Securely store the Secret Value for backup.
Note: Please allow 5-10 minutes for the app registration changes to take effect. You may now proceed with the Add Connection process.
The Instance and API URL fields are automatically filled for Azure Active Directory (AAD).
-
Enter the tenant in Tenant field.
-
Enter the client id in Client ID field.
-
Enter the client secret in the Client Secret field.
Note: The Tenant and Client ID are found in the Overview section of the application that has already been registered on the Microsoft Azure Portal. (https://portal.azure.com/#home)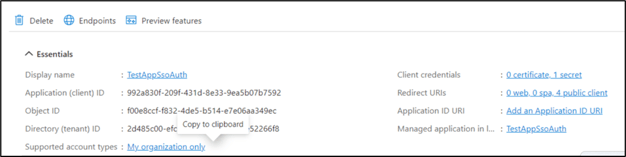
The Client Secret is generated from the Certificates & secrets section: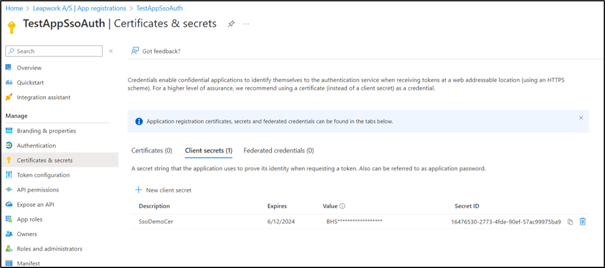
Note: For more information about registering app in Microsoft Azure Portal please visit: https://learn.microsoft.com/en-us/azure/active-directory/develop/quickstart-register-app. - Click the Test connection button to test the connection. The embedded browser will open. Enter the username and password. Click Ok to test the connection.
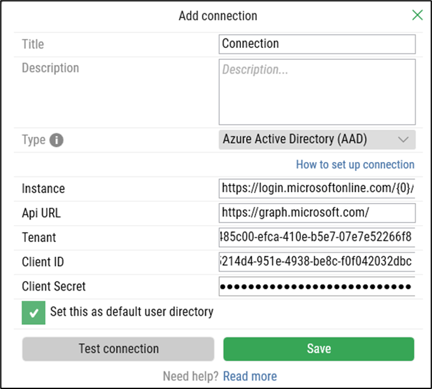
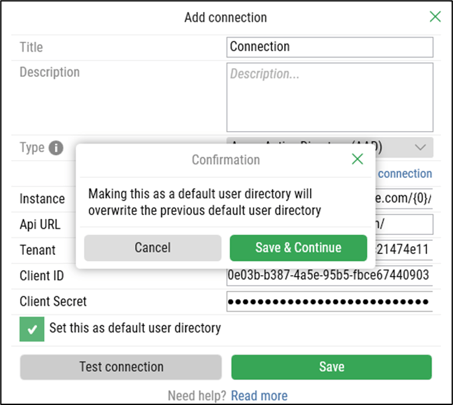
- Ensure that the Set this as default user directory checkbox is selected. Once the connection is tested, a success message will confirm that the connection has been successfully established.
- Click the Save & Continue button to save the details. Once your connection is saved a success message appears to let you know the connection is successful.
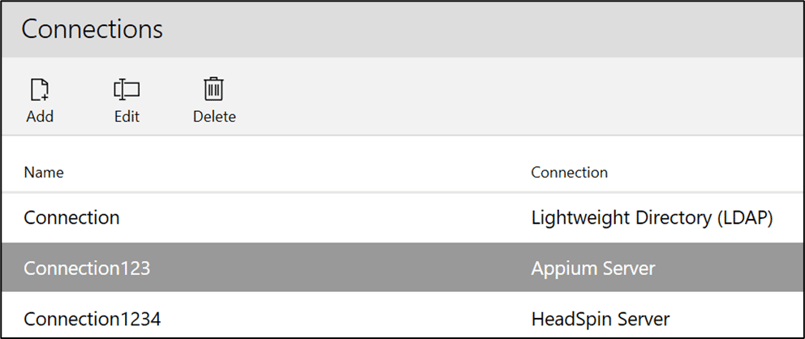
Once the connection is successfully saved, it would be added to the connections list.
Use the Edit or Delete buttons located next to the Add button to modify or remove the connection.