Leapwork on Azure Marketplace installation Guide
Introduction
Leapwork offers the Installation feature on Azure Marketplace.
This user guide provides a step-by-step process for installing Leapwork through the Azure Marketplace.
Note: This only supports Enterprise installation via MS Marketplace. For more information please visit FAQ's.
Objective
The prerequisites for this are listed below:
- You should have Azure subscription to install Leapwork from Azure Marketplace.
- You should have a valid role on Azure subscription to install the application from Azure marketplace.
- You should have Leapwork Studio installed on your system.
- You should have a valid Leapwork license. (Note: Connect with Leapwork account executive to get the license activated.)
Instructions for Installation
Below are the instructions to install Leapwork through the Azure Marketplace:
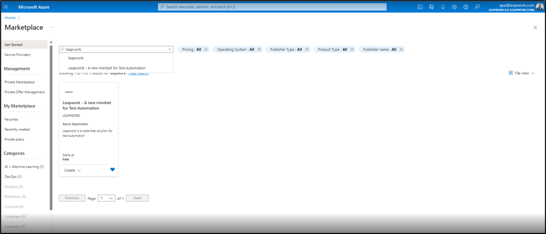
To access Leapwork in the Azure Marketplace, search Leapwork in search field and click Create.
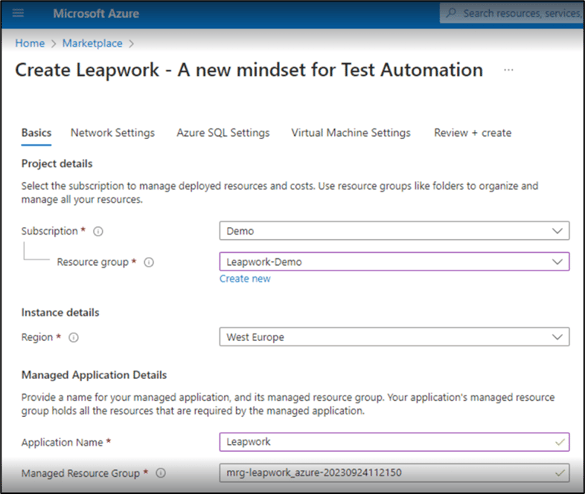
Once you click on Create the new window opens.
Select the Resource group and Application Name from the drop-down list if you want to select from existing list, or you can Enter if you want to Create new.
Select your desired Region and Subscription from the drop-down list, where you intend to host the application, and click
Enter Application Name in the given field.
Managed Resource Group is auto-populated field.
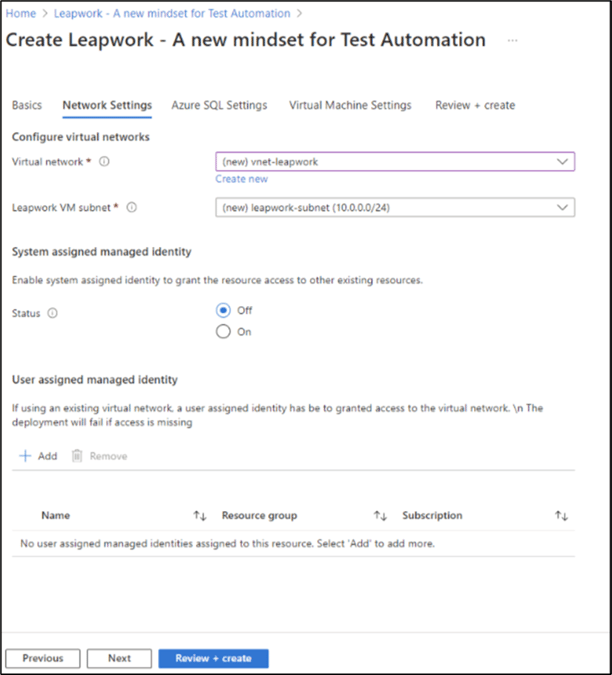
Select the Virtual network and Leapwork VM subnet from the drop-down list or proceed by creating a new vNet and subnet and click Next.
You can adjust the CIDR of the new vNet by editing the virtual network and subnet settings.
Enable system assigned identity to grant the resource access to other existing resources by selecting Status from the radio button.
If you are using an existing vNet, you need to create a managed identity and assign it the contributor role in your subscription.
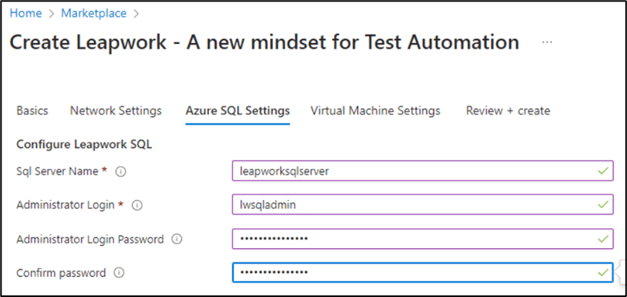
Enter the SQL Server Name, Administrator Login, Administrator Login Password and Confirm password and click Next.
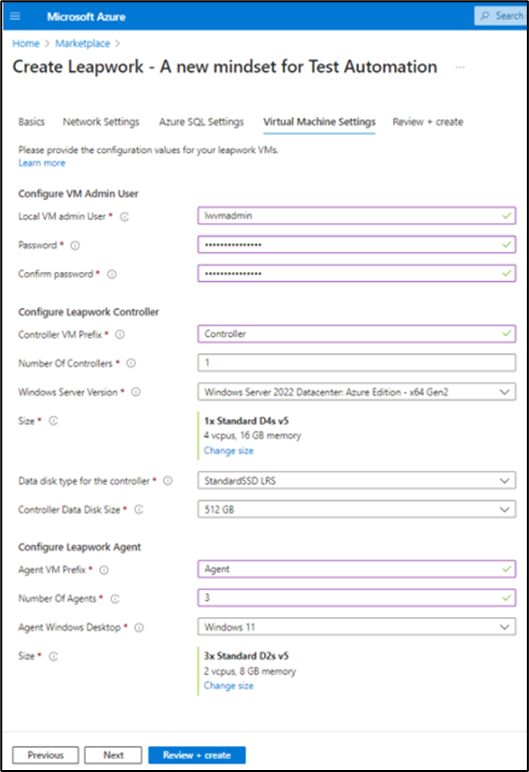
Complete the Virtual Machine Settings (Configuration) as specified below details and click Next. You can adjust the VM configuration to align with your specific requirements.
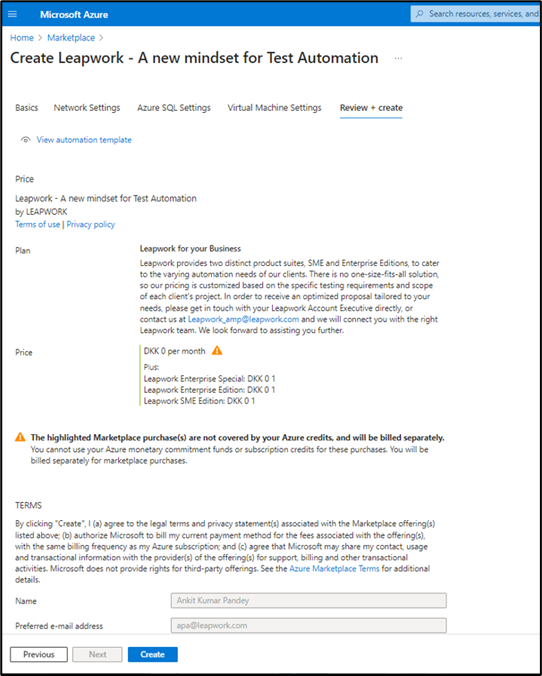
Review the configuration and click on Create. It would take time based on number on Agents used. (Ex: If you have used single agent and controller, it would approximately take 10-15 mins)
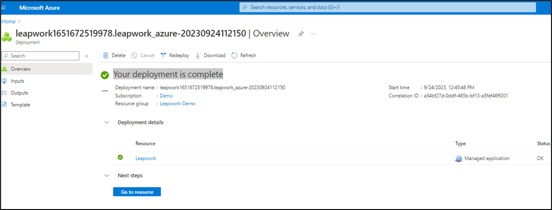
You will get deployment successful message once its completed. Click on Go To resource to review the created resources.
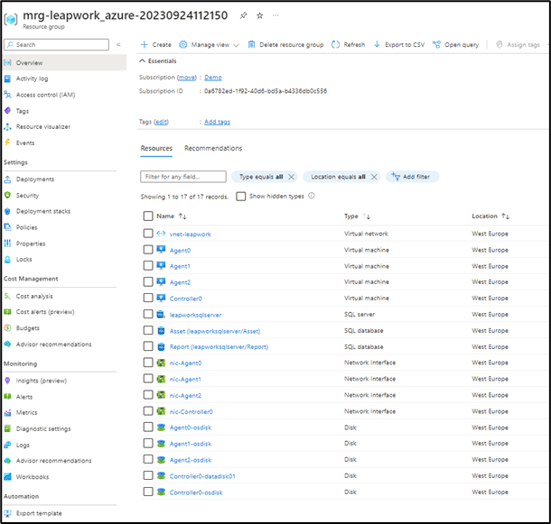
Click on Managed resources to review the created resources as specified below.
You have to associate Network Security groups with Subnet that allow access Leapwork port to these VM. You can refer Leapwork document Firewall and port settings for Leapwork.
You can open Leapwork studio and enter the controller IP detail to start accessing Leapwork to activate license.
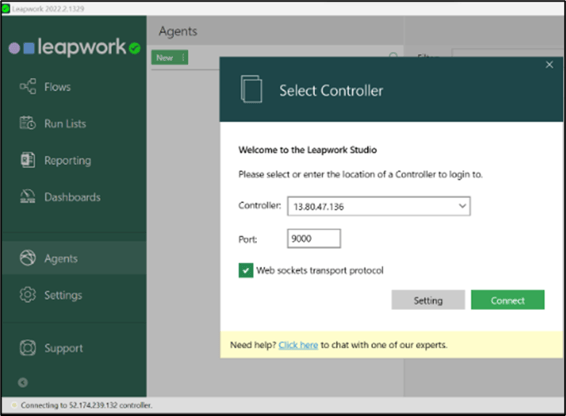
Note: Default username and password to Login Leapwork is admin and this can be changed post login.
Now Leapwork has been deployed in your Azure Subscription as per your requirement without any license.
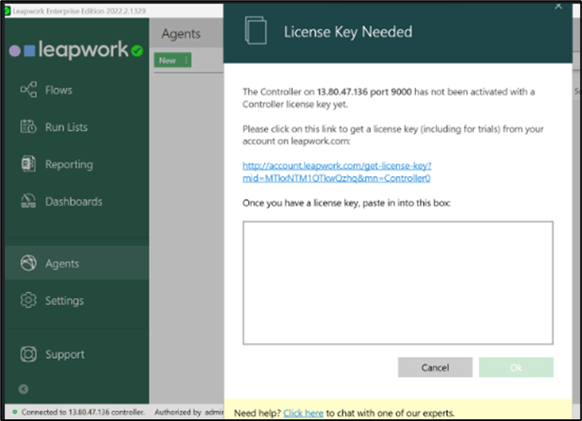
Once the license is activated you can connect agent to controller and start using Leapwork.