Schedules
If you need your automation flows to run at specific times without manual intervention, Schedules help you plan and execute flows automatically, at fixed times, at regular intervals, or on demand.
This article explains what a schedule is, when to use it, and how to create and configure one step by step.
What is a Schedule?
A Schedule defines when a group of automation flows from a Run List should be executed and on which Agents. Schedules can be triggered:
-
On demand – Manually or via API
-
Automatically – At specific times or on a recurring basis
Once created, schedules are saved in the Controller, which is responsible for keeping track of them and executing them on the target environments. Users configure schedules in Leapwork Studio, while the Controller manages the actual execution
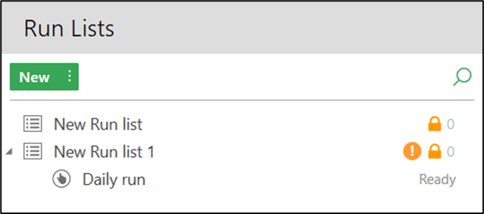
Schedules are associated with Run Lists and can be accessed from the top menu of Run Lists section:
Why use Schedules?
The Leapwork scheduler provides centralized control over the execution of automation flows, helping to optimize both time and resources. It supports:
-
Granular control of when flows run, at specific times of day, in specific time zones
-
Automatic calculation of estimated run time, based on historical performance and parallelization options
-
Control over recurring schedules, including working hours, queue handling, and conflict resolution
-
Easy parallelization, flows can be distributed across selected Agents or run on all simultaneously
-
Handling of busy Agents through queue or skip logic
-
The ability to stop a run immediately if a flow fails or exceeds a defined threshold.
Common use cases
Schedules are commonly used to:
-
Run large collections of test flows against development or QA environments
-
Trigger business processes at specific times
-
Execute flows automatically via the public REST API
-
Run the same flows in different configurations (e.g., browsers, environments, OS)
-
Run nightly regression tests while the team is offline, or start a weekly data sync every Monday at 6 AM. This allows teams to automate repetitive tasks and ensure consistency without manual oversight.
You can design flows once and configure them to run automatically in different conditions, without further manual input.
Create a new Schedule
Follow these steps to configure and activate a schedule:
- In Leapwork Studio, open the Run Lists section from the left-hand side menu.
-
Double-click the Run List you want to schedule.
- Click the Schedules button from the top bar.
- Select New Schedule from the popup. This opens the schedule configuration window.

- Provide a descriptive title that reflects the purpose of the schedule.

- Select the run type from the Trigger drop-down
On Demand The schedule will not be run unless someone explicitly clicks the Run Now button or triggers it to run through the REST API. Scheduled Time-based triggers for the schedule.
For the Scheduled run type, the following parameters should be specified:Time zone Select from the Time zone dropdown to specify when the schedule should run.
Start time The Start time specifies when the schedule should begin. For recurring schedules, this defines the start point for the repetition pattern.
Recurring The option to define whether a single trigger or multiple triggers at regular intervals are required.
-
No recurrence: Runs only once.
-
Every X Seconds/Minutes/Hours/Days/Weeks/Months: Runs at a fixed interval (e.g., every 1440 minutes).
-
After last run with X seconds delay: Loops the execution with a pause between runs.
-
Working hours: Limit when the schedule is allowed to run:
-
Every day, all time: Runs 24/7 with no restrictions
-
Custom: Choose specific days and time windows.
-
End Time The End time is the last time when a run can start and is available only in the case of a recurring schedule. -
- Choose the Agents that will execute the scheduled flows. Select from the available distribution:

-
All flows on each Agent (when all are available)
The entire Run List is executed on each selected Agent.
Use case:
Ideal when you want to validate that the same flows run correctly across different Agent environments—such as different operating systems, browsers, or cloud setups. -
Divide flows on each Agent (when all are available)
The flows in the Run List are distributed evenly across all selected Agents.
Use case:
Efficient when you want to reduce total execution time by running flows in parallel, with each Agent responsible for part of the workload. -
All flows on first available Agent
Only one Agent is selected—the first one that becomes available. That Agent will run the entire Run List.
Use case:
Best suited when only one execution is needed, and it's acceptable to let any free Agent handle the full workload.Example:
This example uses a Run List with four flows (Flow A, Flow B, Flow C, and Flow D), and four available Agents:
-
Remote Agent
-
Leapwork Cloud Agent
-
BrowserStack
-
GridLastic
Agent All flows on each Agent Divide flows on each Agent First available Remote Agent Flow A, B, C, D Flow A Busy Leapwork Cloud Agent Flow A, B, C, D Flow B Flow A, B, C, D BrowserStack Flow A, B, C, D Flow C Busy GridLastic Flow A, B, C, D Flow D Busy -
-
-
Choose how flows should run:
-
Run in order: Follows the sequence defined in the Run List.
-
Run in random order: Shuffles flow execution order.
-
- Click the Variables section and define one or more entries to assign dynamic input values to your flows.
Each variable consists of a name and a value, and these can be referenced inside the automation flows included in the schedule.
This means a single flow can behave differently depending on which schedule triggered it, for example, using different environments, credentials, or configurations. Learn more about how to use scheduled variables

-
To define automated responses based on execution results, go to the Actions section and add one or more actions. For each action:

-
- Select a condition from the dropdown.
- When automation run is completed
-
When have failed more than (you’ll define how many flows must fail)
-
When have passed more than (define the number of passed flows)
-
When automation run is completed but has taken longer than (define duration in minutes)
-
When any flow in automation run has taken longer than (also define time in minutes)

-
Choose the action type.

-
Send email. Opens fields for:
-
Email address (recipient)
-
Subject
-
Text body.
-
-
Send HTTP(S) request. Depending on the selected method (GET, POST, PUT, PATCH, DELETE), different fields will be shown:
-
GET / DELETE → URL, Headers.
-
POST / PUT / PATCH → URL, Headers, variables.
-
-
Run PowerShell script on Controller. Opens fields for:
-
Command
-
(Optional) Username
-
(Optional) Password.
-
-
-
In supported text fields, such as Text, URL, Headers, Post variables, User, and Command, you can right-click and choose to insert:
-
A predefined token, which dynamically includes data from the run
-
A custom variable defined earlier in the schedule.

This allows you to personalize messages, payloads, or scripts with context from the current execution. Here are the available tokens:
Token Description [CONDITION]
This is the condition selected from dropdown while setting the Action for the Schedule. [FAILED FLOWS LIST]
Gives a list of flows which have been failed. [FLOWS DONE]
Gives a count of flows which have been completed. [FLOWS FAILED]
Gives a count of flows which have been failed. [FLOWS PASSED]
Gives a count of flows which have been passed. [RESULTS-JSON]
Gives a result in a JSON format. [RESULTS-TABLE]
Gives the result in tabular format having list of flows along with their execution status. It also gives the number of flows completed, failed and passed. [RESULTS-VIDEO]
Gives the location where the video file of execution of flow is saved. [RUN LIST NAME]
Gives the name of the run list executed. [SCHEDULE NAME]
Gives the name of schedule executed. [START TIME]
Gives a date and time when schedule was started. [TIME TAKEN]
Gives a time taken for execution of the flows in run list. -
- Select a condition from the dropdown.
-
-
Configure optional execution behaviors by clicking Settings:
-
When schedule is already running:
-
Queue next run
-
Skip next run
-
Stop current run and start next
-
-
When selected agent is busy
-
Queue run
-
Skip run
-
-
Reserve agent strategy
-
All agents for step before starting step – All assigned Agents must be free before the next step starts
-
All agents for all steps before starting scheduler – All required Agents across all steps must be available before execution starts
Example: If a schedule is configured to run across 3 Agents using the “All agents for all steps” strategy, and only 2 Agents are currently free, the schedule will wait until the third is also available. This ensures full parallel execution as designed.
-
-
Error handling
-
Stop run if it exceeds a certain % of estimated time
-
Stop run if it exceeds a fixed number of minutes
-
Stop and disable schedule if flows fail
-
-
- Select the Flow Report type (Enterprise editions only):
-
None (default): No PDF report will be generated.
-
Detailed (Coming soon): Currently disabled; will be available in a future release with a more detailed breakdown of flow contents.

Notes:-
Only applies to successful scheduled runs.
-
Does not affect manual or preview executions.
-
Available only for Admin users. Contributors and Readers will not see or be able to modify this setting.
-
-
- Click Apply to create the schedule.
Once applied, the schedule appears in the list. If active, the next run time is displayed. You can also right-click the schedule and select Run Now to launch it manually.