Sub-flows
Building your automation functionality into reusable components - we call them sub-flows - enables you to design automation flows faster and significantly reduces maintenance time.
Sub-flows consist of existing building blocks that fulfil a repetitive step, for example login/logout actions. They can also be made up of other sub-flows. Sub-flows can be added as many times as needed inside any automation flow.
Creating and organizing sub-flows
Sub-flows can be created in two ways:
One way is to select building blocks that make up part of an existing automation flow, right-click on one of the selected elements, and choose “Create Sub-flow”. This will wrap up all selected building blocks and connectors into a new sub-flow then prompt you to give it the sub-flow a title:
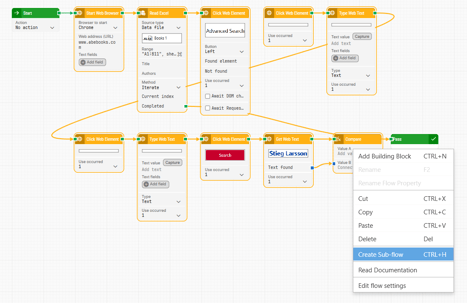
In the example above, four building blocks have been selected to create a new sub-flow, which has been named “Check total”:
The second way to create a sub-flow is to right-click anywhere in the flow tree-view and choose the “Create sub-flow” option. This will create a new, empty sub-flow.
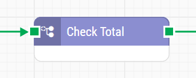
Sub-flows are shown with this icon in the flow-tree:
Sub-flows can be dragged to any folder or placed below a specific flow. Since sub-flows are shared across all folders and flows in the tree-view, it often makes sense to organize sub-flows in a dedicated folder so it easy to find and implicitly understand its purpose.
Adding sub-flows to a flow
To add a sub-flow to a flow, simply drag the sub-flow from the tree-view onto the Leapwork Design Canvas.
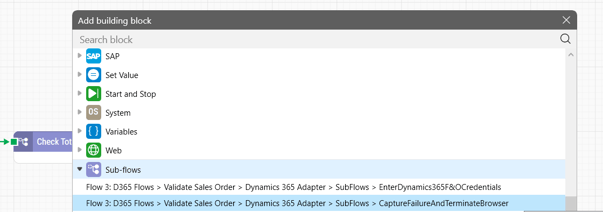
Another way is to right-click the design canvas, select “Add new building block”, and then choose the sub-flow from the “Sub-flows” category:
Editing a sub-flow
There are several instances where you would want to edit an existing sub-flow. For example, to add parameters and additional connectors, to simply update the functionality inside the sub-flow, or to rename the sub-flow. When a sub-flow is updated, all dependents (flows using the sub-flow) are automatically updated. This is why using sub-flows is a great way to reduce the burden of maintenance.
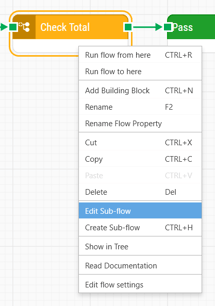
To edit a sub-flow, either right-click the building block from the Design Canvas and select "Edit Sub-flow" or open it from the tree-view structure:
Adding parameters
Adding parameters is a valuable feature of sub-flows. This increases the re-usability and allows for the sub-flows to be completely data-driven.
Parameters are defined by a specific category of building blocks that can only be used inside sub-flows: Value Input and Value Output. A sub-flow can contain any number of input and output parameters, and it’s possible to change the name of the parameters, by changing the name of the Value Input and Value Output building blocks. To change the name, double-click on the title of the building block and enter the new title.
In the example below, one input parameter is added to the sub-flow. The parameter is renamed “Value A”:
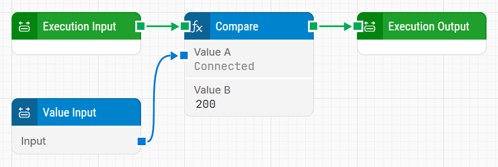
When this sub-flow is added to a flow it will look like this:

Connectors to sub-flows
The green connectors on a sub-flow are defined by a specific category of building blocks called Execution Input and Execution Output. It is possible to have multiple connectors to and from a sub-flow, although typically only multiple output connectors are used. Multiple output connectors means the sub-flow can handle branching of the flow.
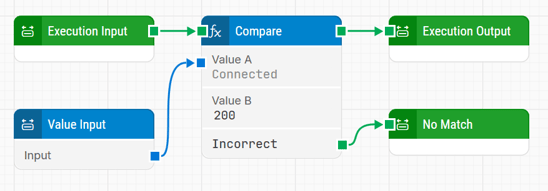
In the example below, the sub-flow has two output connectors depending on the comparison operation. If the input value matches ‘200’, then the top green connector is triggered. Otherwise the ‘Incorrect’ green connector is triggered. To make the sub-flow even more useful, the second green connector has been renamed to ‘No match’:
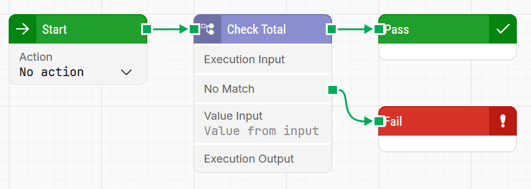
When this sub-flow is used in a flow it looks like this:
Renaming a Sub-flow
When a sub-flow is added to an automation flow, the sub-flow will by default have the given name of the sub-flow, i.e. the name shown in the tree-view. Whenever a sub-flow is changed, it is automatically reflected in the flows containing the sub-flow—except for changes made to the name of the sub-flow.
Once a sub-flow is added to a flow, the user designing the given flow is free to change the title of the specific instance of the sub-flow building block inside the flow. This means that if the name of the sub-flow is changed, i.e. by right-clicking in the tree-view and selecting “Rename”, then the title of the sub-flow block in the current flow will change.
For more information on working with Sub-Flows, check out this tutorial.