Lightweight Directory Access Protocol Server Connection
Lightweight Directory Access Protocol (LDAP) is a protocol for connecting to a directory service and it is used for accessing and maintaining user information. Organizations may have customized user directories which follow LDAP protocol. This feature will support such a customized user directory so that users/groups can be added to Leapwork.
Notes:
- This feature can be accessed by Leapwork Admin only.
- Leapwork users can only use one directory at a time and cannot switch between Active Directory (AD) and LDAP.
- It is recommended to delete AD and LDAP users from Leapwork's User Management tool rather than deleting them directly from AD or LDAP.
- Leapwork does not support adding AD users or groups and then adding LDAP users or groups.
- Existing AD users or groups will be deleted if a user switches from AD to LDAP and vice versa.
Add Connection
To add a connection, click the Add button and the following pop-up appears:
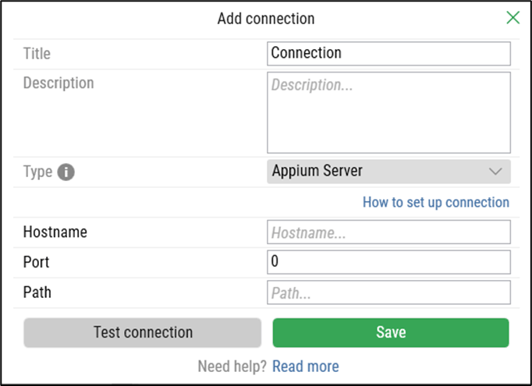
On the Add Connection pop-up window:
- Enter the title in the Title field. It should be unique.
- Enter the description in the Description field.
- From the Type drop-down, select the Lightweight Directory (LDAP) option:

- Select LDAP and the following new fields appear:
-png.png?width=400&height=546&name=imagen%20(4)-png.png)
-
Enter the following mandatory attributes to establish a connection with the LDAP server:
- LDAP Server
- Port
- Bind DN or User
- Bind Password
Note: For optimal performance, it is recommended to use port 389.
All other attributes are optional. Users can configure these attributes based on their requirements:
-
Use SSL: Enables SSL/TSL encryption.
- Note 1: Customers must configure LDAP over SSL, including certificate installation. Verify the connection using an appropriate tool.
- Note 2: For optimal performance, use port 636.
-
Domain: The server address where the directory is hosted.
-
User: Authorizes the user in the LDAP directory.
-
Full Name: Displays the names of users authorized in the LDAP directory.
-
User Unique Identifier: Uniquely identifies the user based on the assigned ID.
-
MemberOf: Fetches groups of users logging into the platform and authorizes them accordingly.
-
Group: Authorizes a group in the LDAP directory.
-
Group Unique Identifier: Uniquely identifies the group based on the assigned ID.
-
Allowed Groups: Searches for new users added directly as LDAP users.
- Group names should be separated by commas to add multiple groups.
- If a new user is added but is not part of the specified group(s) in the LDAP connection settings, an error message will appear.
- If no groups are specified in Allowed Groups, the entire LDAP directory is considered for user search.
-
Default User Directory: This checkbox is selected by default.
- Click the Save & Continue button to save the details. Once your connection is saved a success message appears to let you know the connection is successful.
Once the connection is successfully saved, it would be added to the connections list.
Use the Edit or Delete buttons located next to the Add button to modify or remove the connection.
Add an LDAP User
Leapwork integrates with LDAP to provide centralized user management, enabling administrators to easily manage user accounts and permissions while ensuring secure and streamlined access to the platform. To do that, follow these steps to set up and configure an LDAP connection effectively:
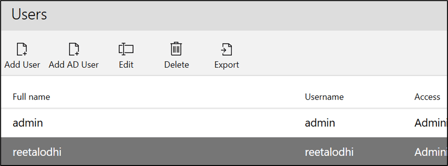
- Go to User Management in the Settings section.

- Click Add AD User to open a new window.

- Enter the User or Group Name to authorize the user or group in the LDAP directory.
- Select Access from the drop-down menu.
- (Optional) Check the Team checkbox based on your requirements.
- Note: The Team checkbox is only available for Leapwork Enterprise Edition users.
- Click Save to save the User or Group.
- To the right of the Add AD User button, use the buttons Edit, Delete and Export to change or remove user profiles or to export them in an Excel format.